
Setup Custom Factors
This page outlines the how to extract custom emissions factors, make changes, add new factors and upload to Envizi.
Basic instructions
Navigate to the Custom Factors page: Admin | Configuration | Custom Factors
Run the Setup Custom Factors report by clicking Extract Factors.
Review your factors and make necessary changes using the guidance below.
Save your changes as an .xlsx document.
Upload to Envizi using the Upload Factors button
Verify that the file was successful by using the Files Processed - Accounts & Setup page.
Prerequisites
Your organization must subscribe to the Sustainability Data Management and Reporting module.
Your organization must also have a 1 or more custom factor sets configured for use. This is accessed through custom factor management. Please raise a ticket with our help desk to enable this functionality.
You must be logged in as a system administrator.
Functions on the Custom Factors page
There are 2 functions available on the custom factors page to help you extract, transform and load factors back to Envizi.
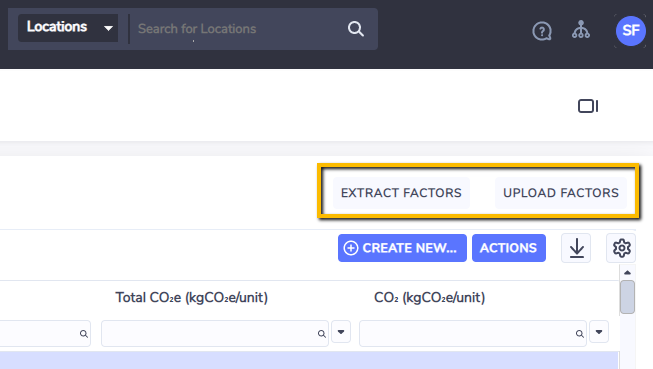
Extract Factors - This button will generate a report for you so you can make your changes or add new factors.
Upload Factors - This button will allow you to upload your Excel file directly to Envizi. You can check the status of your file by navigating to Manage | Files Processed - Accounts & Setup page.
Files Processed - Accounts & Setup - Note that it usually takes about 2-3 minutes for the file to appear in the Files Processed - Accounts & Setup page. If the file does not appear check the following:
File name must have the format of: ‘Setup_Custom_Factors<optional text>.xlsx’
The first tab in the file should be named ‘Setup’.
The file structure has been edited (eg, a new column has been inserted or a column has been deleted)
The region name entered doesn’t match the region name in Envizi. To verify, download the region extract.
Troubleshooting - Any errors encountered will show <*Error*> in the File Status column. To investigate the cause of the error, right-click on the row and select Load Errors and read the Message displayed for the error.
Note - factors will be applied to your data over the weekend. This delay is to avoid putting unnecessary strain on the database as this can sometimes cause large emissions recalculations.
File and column validation
First , search for the report using global search or navigate to the Extract Reports folder.
Open the file in excel and immediately save the file with the name ‘Setup_Custom_Factors<optional text>.xlsx’ where <optional text> can be anything that helps you differentiate files.
Rename the first tab to Setup
When making edits in Excel, please take note of the following:
To delete a value in a field you must enter the world NULL contained within square brackets like this: [NULL] . This function is added to increase security so that if some fields are deleted by accident they are not lost when a factor is updated. This applies to all Optional fields.
This connector does not allow you to delete factors entirely. This can be done easily in Envizi by navigating to Admin | Configuration | Custom Factors. Multi-select factors you wish to delete and then right-click, delete. Note that there is no undo function for this so proceed with caution.
The Action, Organization, Associate_Link fields must always be populated for the file to be processed when creating a new factor, and the Factor_Link must also be populated when updating a factor.
Do not add or delete columns in this report. Any columns added or deleted will be caught as a load error.
Region: To enter the Country, State or City, you must enter regions exactly as they are recorded in Envizi. See below for an extract of all regions. If your region is unavailable then you can also create a custom region.
Scientific Notation: You may encounter an error if your file contains very small numbers that result in scientific notation, eg: 3.413E-05. To fix this, format all columns that contain numeric values where at least 1 value is shown as scientific notation as ‘number’ with 8 decimals, you can avoid this error. This is particularly relevant for the CH4 and N2O columns.
Region extract
You may experience a common validation error when loading your factors:
This creates a conflict with 1 or more existing factors in the database. Please check that the effective and published dates do not overlap with any factors that share the same data type, sub type, factor set and region.
This usually happens when published dates are not entered. Note that even if your factors are not using published dates, you must still enter a date value in the published date fields if 2 or more factors are being created within the same data type, sub type, factor set and region.
Best practice is to set the published dates to have the same values as the effective dates.
More information on this validation can be found here.
Field Validation
Action | Mandatory. 2 valid values are:
|
Organization | Mandatory. Do not edit or delete the value in this column. Every row (both CREATE and UPDATE) must contain the name of your organization for the record to be processed. |
Associate_Link | Mandatory. Similar to ‘Organization’, the ‘Associate_Link’ id must be entered into every row for both CREATE and UPDATE. |
Factor_Link | Mandatory. This field is required only for rows where the ‘Action’ field is set to UPADTE. |
Country | Optional. This field is not required for global emission factors. This field is mandatory for Country, State or City level factors. The name of field must exactly match the values in the Envizi database. A complete list of Envizi’s ‘regions’ can be downloaded from the link above this table. |
State | Optional. This field is not required for global or country level emission factors. This field is mandatory for State or City level factors. The name of field must exactly match the values in the Envizi database. A complete list of Envizi’s ‘regions’ can be downloaded from the previous section. |
City | Optional. This field is not required for global, country or state level emission factors. This field is mandatory for City level factors only. The name of field must exactly match the values in the Envizi database. A complete list of Envizi’s ‘regions’ can be downloaded from the previous section. Note if you have configured a custom region you can find the name of that region by navigating to Admin | Configuration | Custom Regions. Also take note of the State and Country as those fields are mandatory when providing ‘City’. |
Factor Set | Mandatory. |
Scope | Mandatory. As Envizi contains a few data types that exist in more multiple GHG Scopes, there is validation on this field. Acceptable values include:
|
Data Type | Mandatory. The data type must be entered exactly as it is in Envizi and the correct Scope must also be entered for validation. |
Sub Type | Optional. This is a rarely used function that can differentiate factors that exist within a data type, region and factor set for the same time period. An example of this might be various grades of paper or transport fuel grades (92, 95, 98 octane). If you need to make use of this function please raise a ticket with our help desk. |
Name | Mandatory. |
Description | Optional. This is for your records only and there is no validation on this field. |
Total CO2e(kgCO2e/unit) | Optional. This is the value on which all emissions are calculated. If this value is omitted then emissions will not be calculated for data linked to this factor. |
CO2(kgCO2e/unit) | Optional. This value is only apparent in the Emissions Performance dashboard. |
CH4(kgCO2e/unit) | Optional. This value is only apparent in the Emissions Performance dashboard. NOTE: You may encounter an error if your file contains very small numbers that result in scientific notation, eg: 3.413E-05. To fix this, format all columns that contain numeric values where at least 1 value is shown as scientific notation as ‘number’ with 8 decimals, you can avoid this error. |
N2O(kgCO2e/unit) | Optional. This value is only apparent in the Emissions Performance dashboard. |
BioCO2 | Optional. This value is only used in extract reports |
Indirect CO2e(kgCO2e/unit) | Optional. This value is only apparent in the Emissions Performance dashboard. This is also sometimes known as the Well-to-tank (WTT) conversion factor and refers to the upstream Scope 3 emissions associated with extraction, refining and transportation of the raw fuel sources, before consumption in their intended activity. In the case of electricity it can also refer to the downstream Scope 3 emissions associated with grid losses from transmission and distribution (the energy loss that occurs in getting the electricity from the power plant to the organisations that purchase it). |
Energy(GJ)/unit | Optional. This value is needed to show energy in reports and dashboards. For example, if the factor being entered is measured in kWh, the conversion = 0.0036 GJ/kWh |
Mass(Kg)/unit | Optional. This value is needed to show mass in reports and dashboards. For example, if the factor being entered is measured in lbs, the conversion = 0.453592 kg/lbs |
Volumn(L)/unit | Optional. This value is needed to show volume in reports and dashboards. For example, if the factor being entered is measured in m3, the conversion = 1000 L/m3 |
Area(m2)/unit | Optional. This value is needed to show area in reports and dashboards. |
Distance(m)/unit | Optional. This value is needed to show distance in reports and dashboards. |
Effective_From | Optional. This is required to determine the starting effective period of the factor. If left blank the factor will apply for all time into the past. |
Effective_To | Optional. This is required to determine the starting effective period of the factor. If left blank the factor will apply for all time into the future. |
Published_From | Optional. This is required to determine the starting effective period of the factor according to when the factor was published. If left blank the factor will apply for all time into the past. See Factor Published Date Logic for more information. If your organization does not apply factors based on when they were published then this field should contain the same value as ‘Effective_From’. |
Published_To | Optional. This is required to determine the starting effective period of the factor according to when the factor was published. If left blank the factor will apply for all time into the future. See Factor Published Date Logic for more information. If your organization does not apply factors based on when they were published then this field should contain the same value as ‘Effective_To’. |
Review_On | Optional. This is for your records only and there is no validation on this field. |
Factor_Source | Optional. This is for your records only and there is no validation on this field. |
Notes | Optional. This is for your records only and there is no validation on this field. |
Additional validation
Factors cannot be loaded into Envizi that have overlapping effective or published dates that share the same region, data type, sub type and factor set. More information on this can be found in the custom factor management page.