Setting up Contacts + Logins
To give someone access to login in to Envizi, you will need to create a Contact and then a Login with the appropriate access levels for that new user. Alternatively, you can use the Create New User functionality to set up the user with both a contact and a login in one step.
If you want to set up someone to receive emailed reports, dashboards or notifications or links to PowerReports but to not actually give them a login to the Envizi platform, you can create them as a contact only and you do not need to create a login for them.
Only System Administrators can create, edit and delete contacts and logins.
A System Administrator can also set your organization's password policies that apply to all logins' passwords.
Creating a Contact
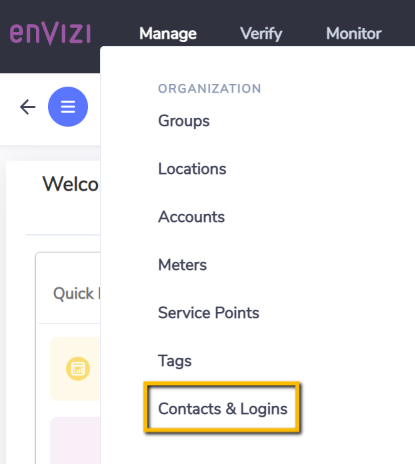
from a Contacts grid either from the main menu Manage > Contacts & Logins.
OR
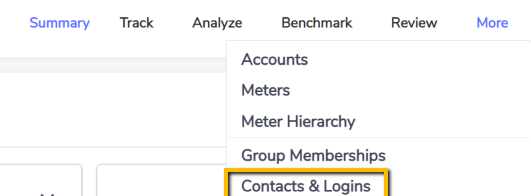
from a Location > More > Contacts & Logins.
You can create a new contact by clicking on Create New Contact...

You will then need to fill in the contact form, where *= mandatory fields.

Editing a Contact
You can edit a contact from a Contacts grid by selecting the action Edit Contact.
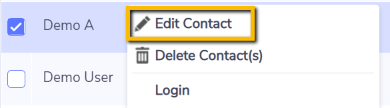
Deleting a Contact
You can delete one contact at a time.

OR
you can perform a bulk operation and delete multiple contacts in one action.

When you delete a contact, the related login will be deleted too.
Creating a Login
From a Contacts grid click Login.

From the Contact Login grid click Create New.

Fill in the form.

Contact - the contact for whom the log-in is being made.
User Name - Defaults as the email address for the Contact but you can change this to something else if necessary as long as it is unique and users an email address convention.
Password - An auto-generated password is created for the Login. Either make note of this password to share with the user or enter an alternate initial password. Note the login credentials will not be automatically emailed to the user.
Expires on - the date after which the log-in will no longer be active.
Enabled - check if you would like the log-in to be functional.
Language - This will default to the language based on the region of your organization. You will only have an option to change it if your organization is in multiple regions. Your language choice impacts how dates and numbers are formatted. The languages supported by Envizi are English and US English.
Access Level - Select either Organization, Group or Location. An organization user has access to all data in the platform. A group user has access only to the data in the groups they manage. A location user only has access to the data in the location in which they were created.
To set up a login as a group user, you would have needed to first set up the contact as a group manger of at least one group.
Time Zone - This impacts the date and time you will see in the platform. Dates and times of account data (Records) and interval meter data are not impacted by this setting as they display according to how they were captured.
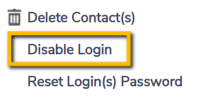
Disabling Logins
You can disable a login for one contact at a time.
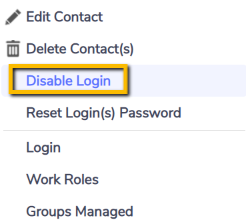
OR
you can perform a bulk operation and disable logins for multiple contacts in one action.