
Setting up Notification Contacts
You should set up Notification Contacts when you want to assign issues to particular logins in specified circumstances or you want to notify particular contacts or logins about an issue or an alert raised by the platform.
System Administrators can set up notifications contacts for multiple locations in one easy step either at an organization or group level. General users can set up notification contacts at a single location.
Organization
From the Manage menu, click on “Notification Contacts”.

You will see all notifications previously setup across the Organization.
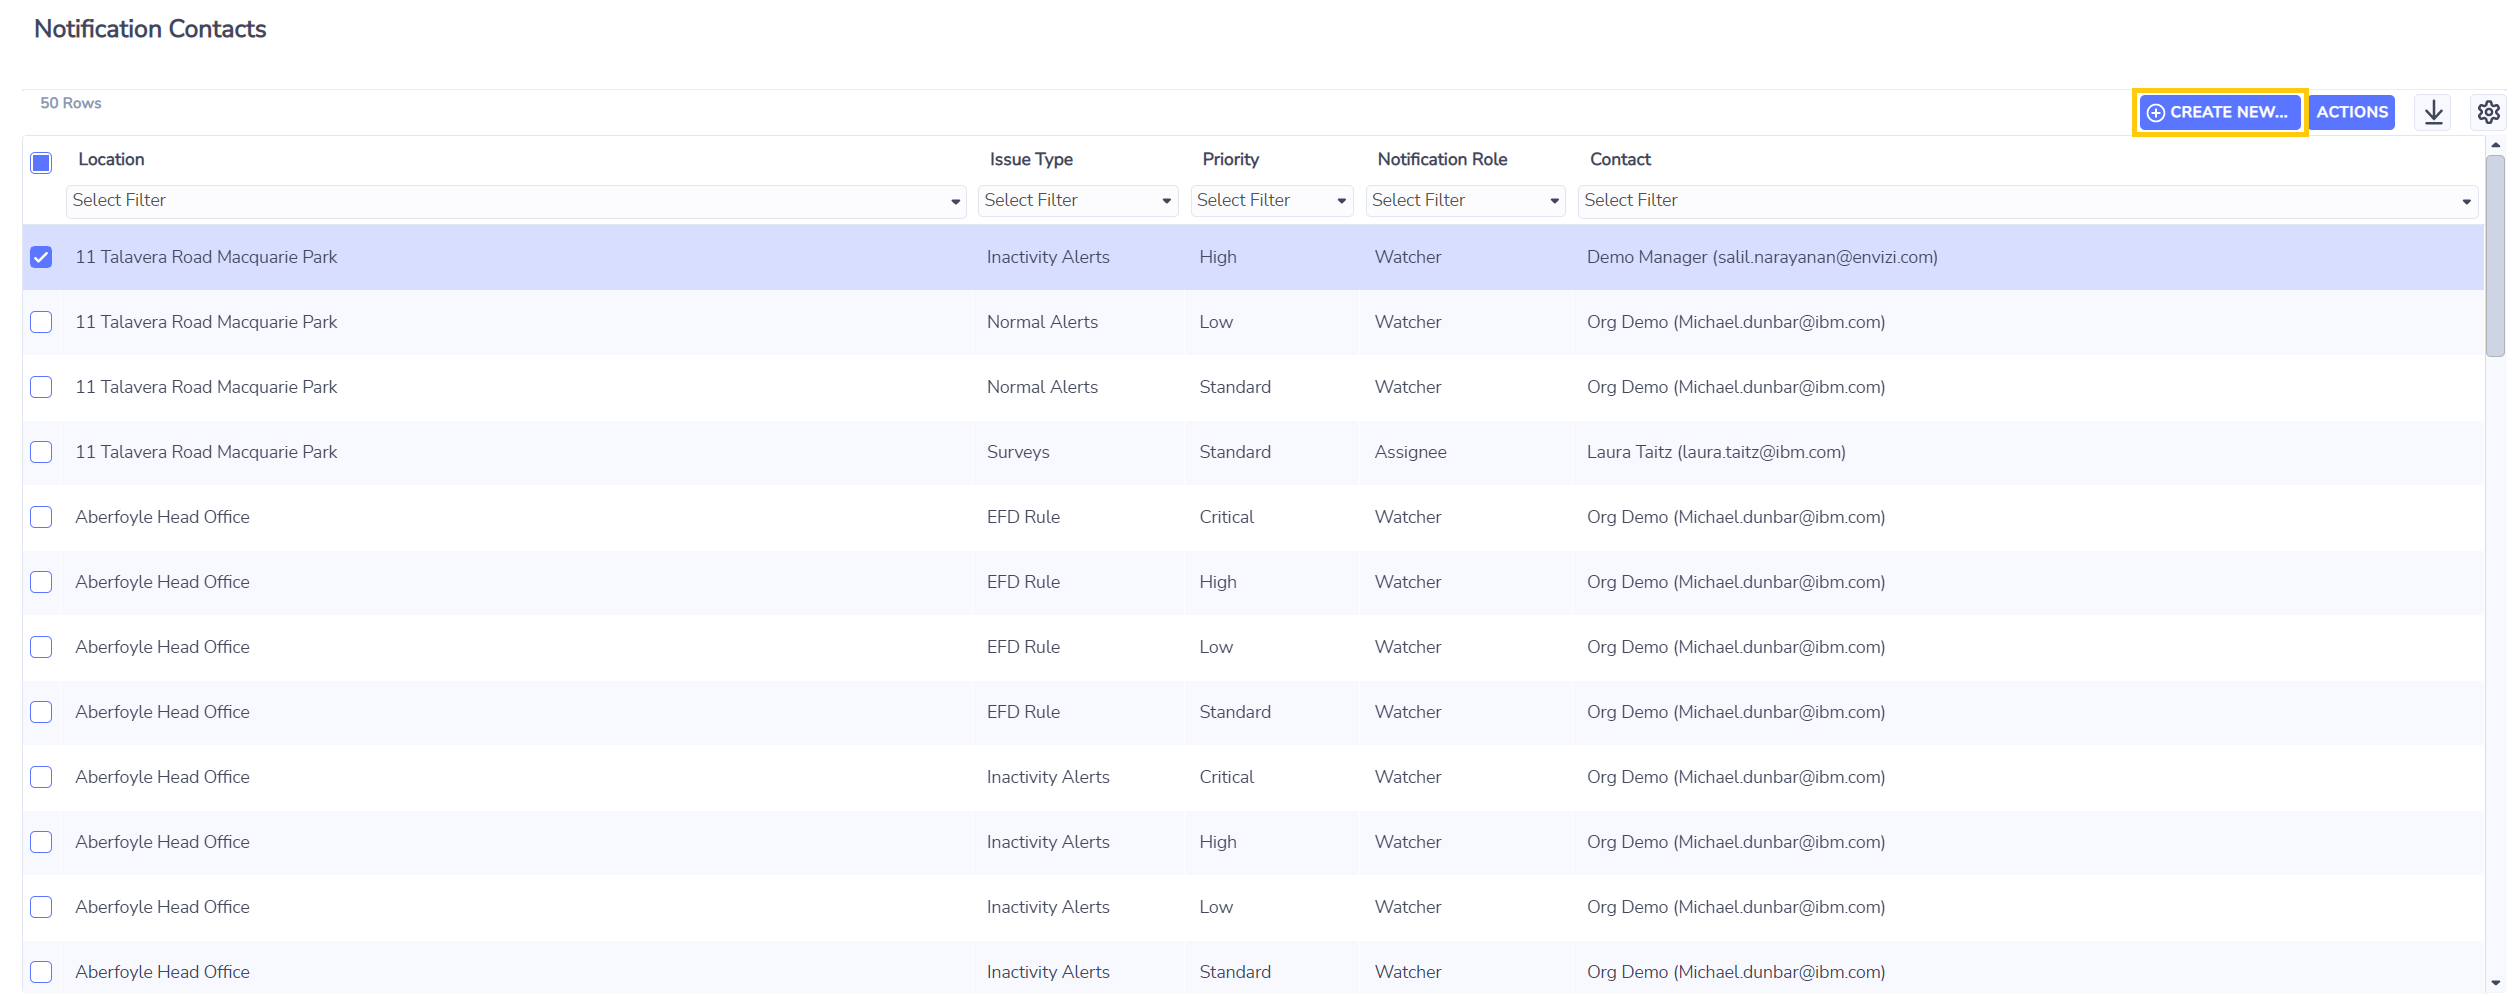
To delete existing, select the rows you want to delete and right-click “Delete Notification Contact(s)”.
To add or replace existing notification contacts, click the Create New button.
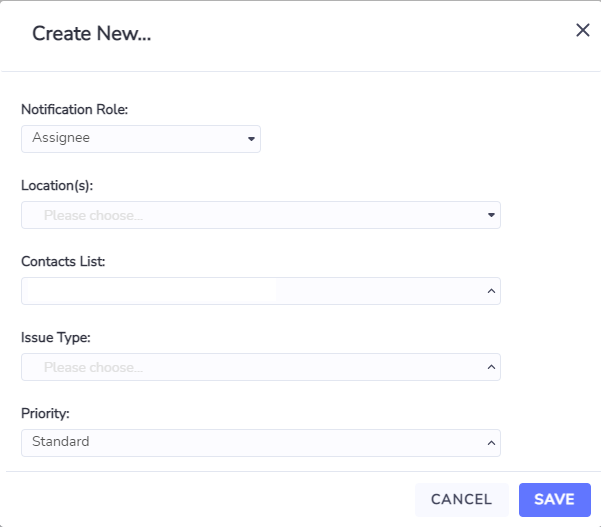
Select whether you are creating an Assignee or a Watcher. Note: Surveys, Value Chain Surveys and Data Capture issue types use Assignee only.
Select all the Locations you want to set up in this bulk action.
If you are setting up an Assignee, select the Login in the Contact List who you want to be the assignee for the selected locations, Issue Type and Priority.
If you are setting up Watchers, select all the Contacts in the Contact List who you want to be the watchers for the selected locations, Issue Type and Priority.
Select the relevant Issue Types (the picklist is based on the products your organization has purchased).
Select the relevant Priorities (Critical, High, Low, Standard). Note: Surveys, Value Chain Surveys and Data Capture issue types use Standard only.
When you click Save, multiple rows will be created in the Notifications Contacts grid for every location and combination of Issue Types and Priorities you selected.
You can only have one assignee per Location, Issue Type and Alert Priority combination.
An assignee needs to have a Login, they cannot just be a Contact.
Only Logins who have permission to access the Locations selected will appear in the picklist.
If you are setting up an Assignee and the combination of Issue Type and Priority you included already exists, the existing Assignee will be removed and the new Assignee will replace it.
Group
Go to Manage > Groups > right -click “Notification Contacts” and follow the same steps as above.
or go to a Group and then go to More > Notification Contacts and again follow the same steps as above.
Location
To set up Notification Contacts for a single Location, from any Locations grid > right -click “Notification Contacts” and follow the same steps 1-8 as above, or go to a Location and then go to More > Notification Contacts and again follow the same steps 1-8 as above.
To set up Notification Contacts for a multiple Locations, from any Locations grid select all the Locations you want to set up and then right -click “Add Notification Contacts” and follow the same steps 2-8 as above.
Setting up Notification Contacts in Bulk via a Template
Setting up Notification Contacts in Bulk via a Template