
Provisioning IBM Planning Analytics (Integration)
The Planning Analytics integration configuration options will be available if you purchase the Planning Analytics AddOn. A maximum of one (1) Planning Analytics integration data service can be configured for each Envizi instance.
Provision Planning Analytics integration data service
To configure the Planning Analytics integration:
Go to Data Services page from the menu Admin → Data Flow Automation. This will display the Data Services grid on the page.
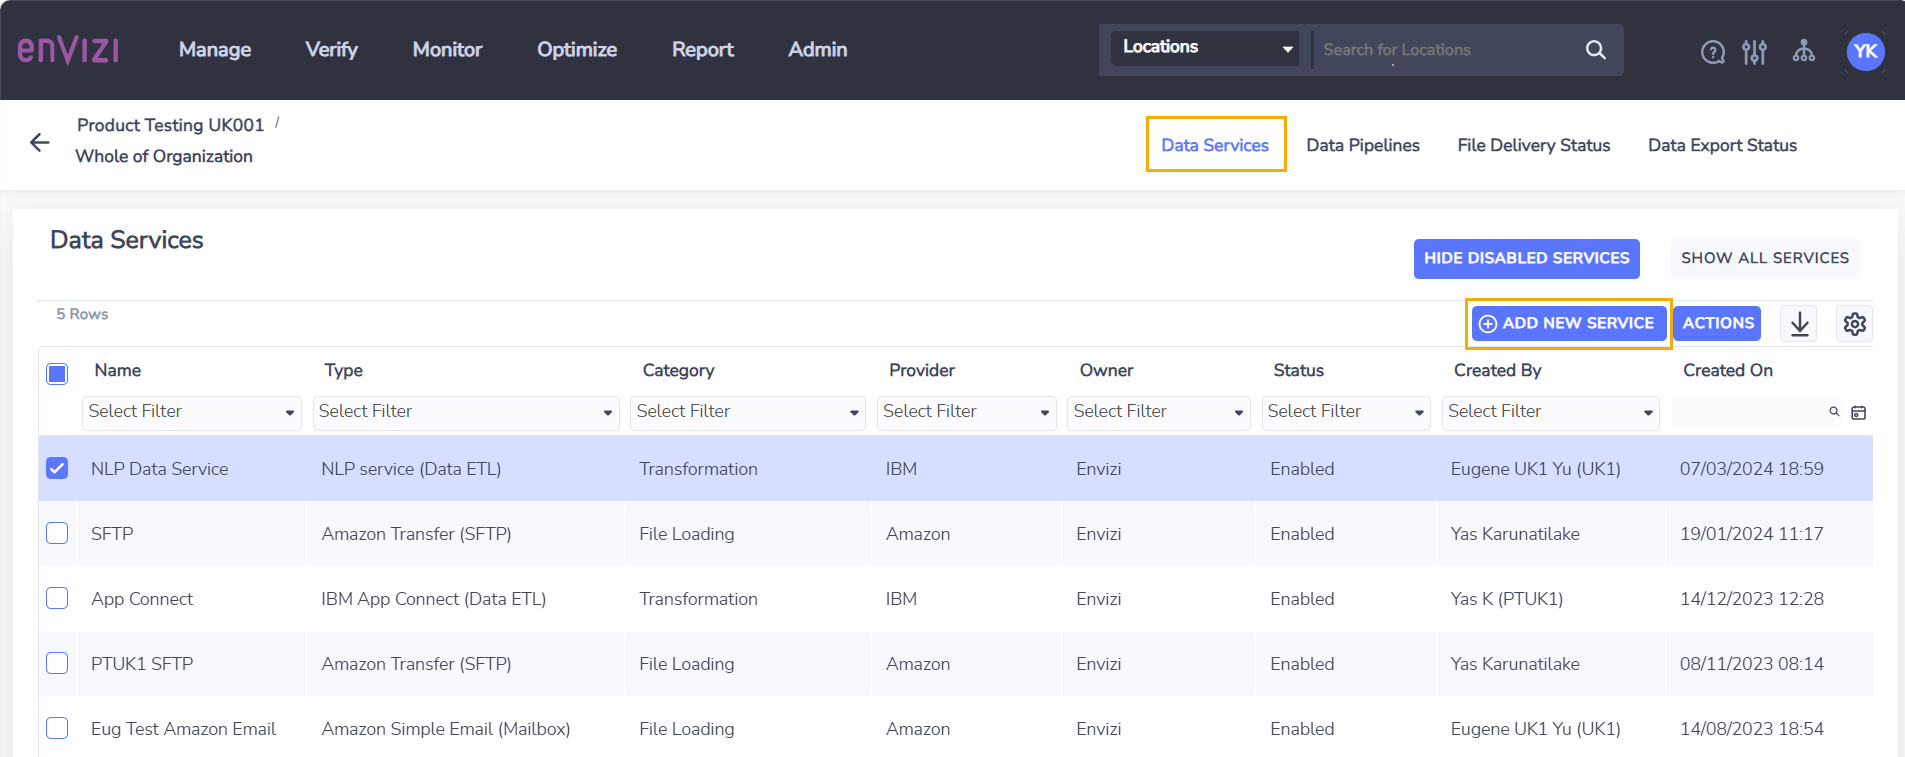
Select Add New Service to open the Add New Service screen.
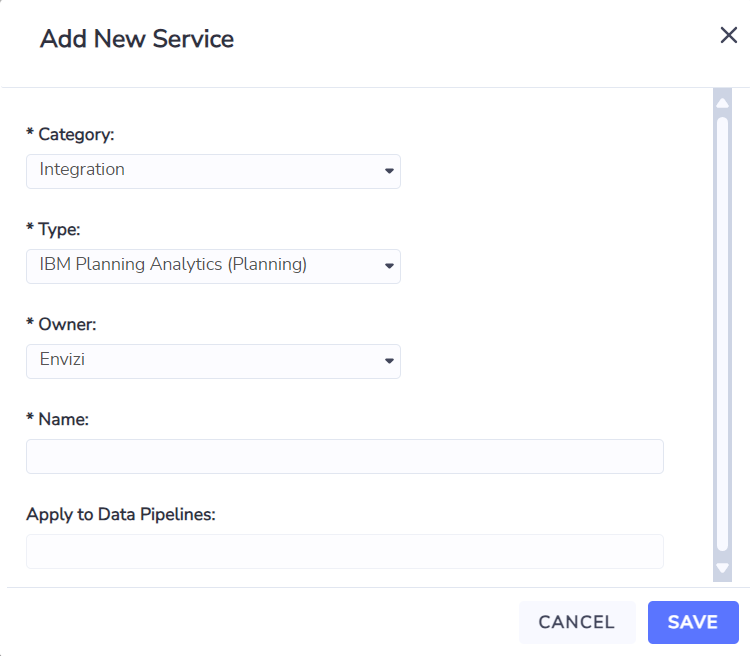
Select Integration from the Category field.
Select IBM Planning Analytics (Planning) from the Type field
Select Envizi from Owner field
Enter a name for the data service in the Name field
Click Save to create the integration service.
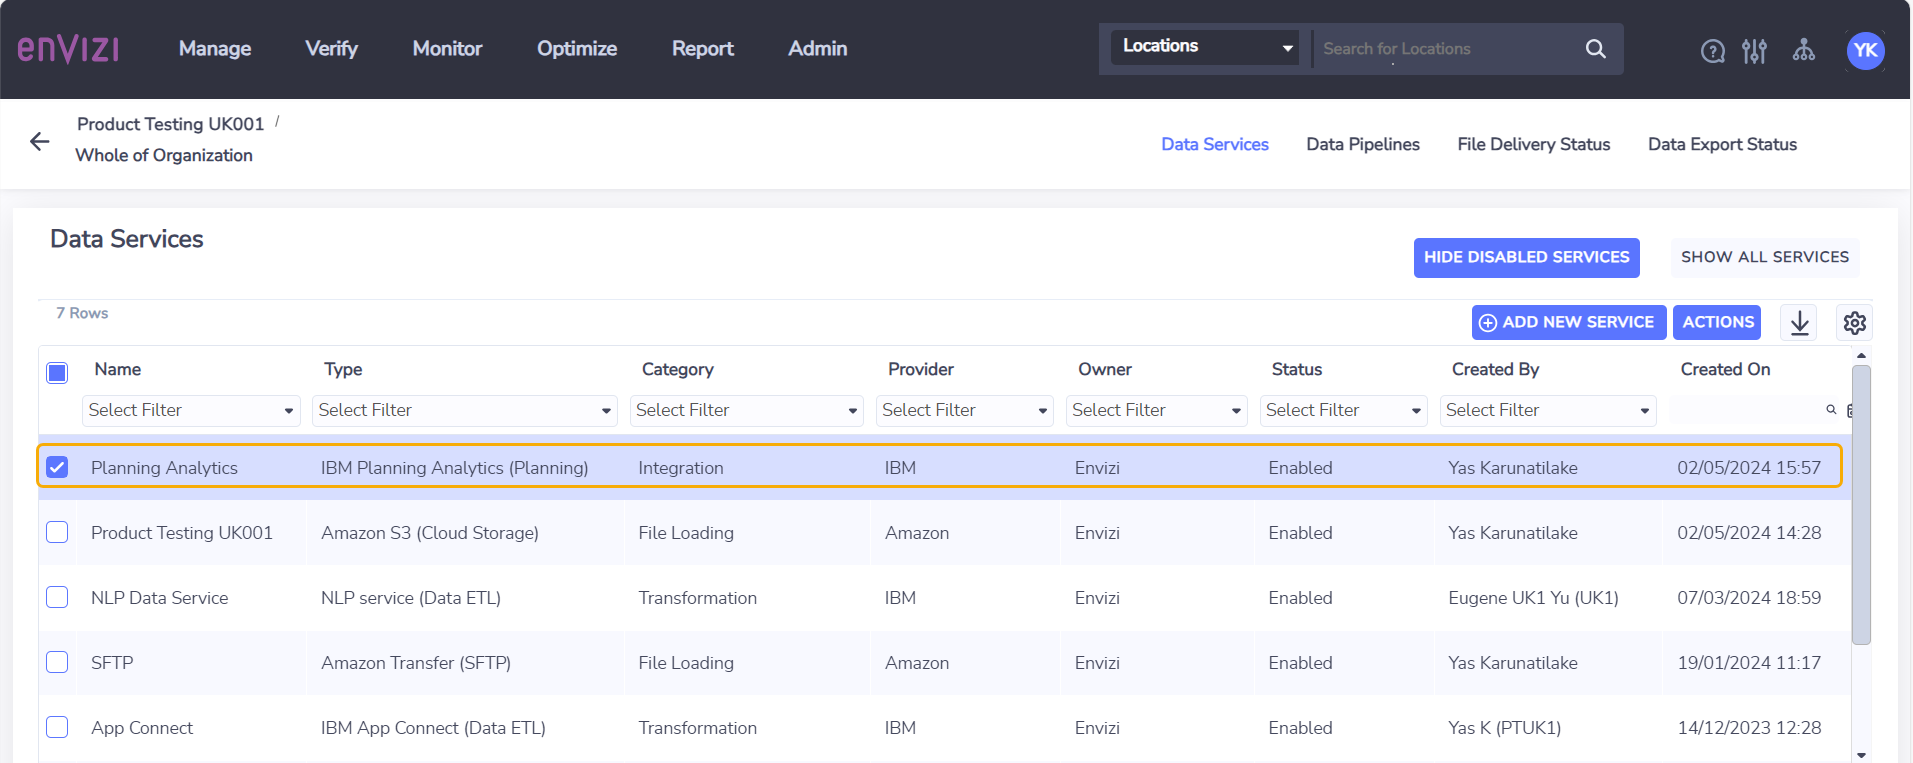
On the Data Services page, the new Planning Analytics integration service is listed.
Manage Planning Analytics integration connection details
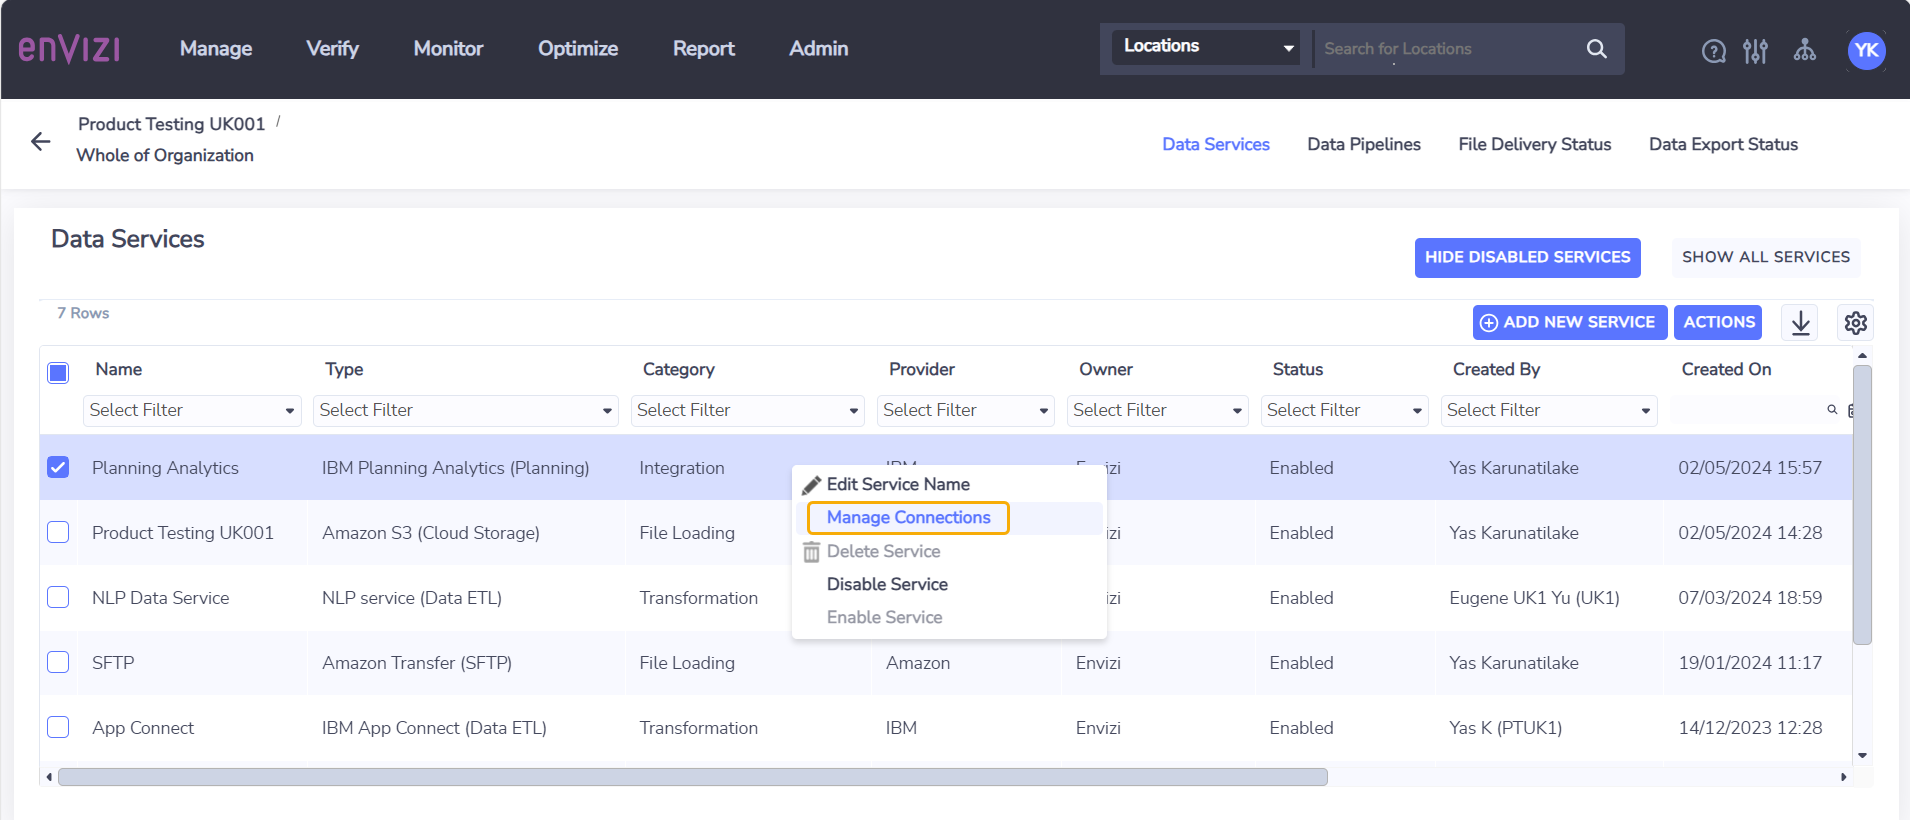
On the Data Services page, select the Planning Analytics integration data service.
Right-click and choose Manage Connections from action menu. This will open Manage Connections screen.
On the Manage Connections screen, the grid shows the following columns:
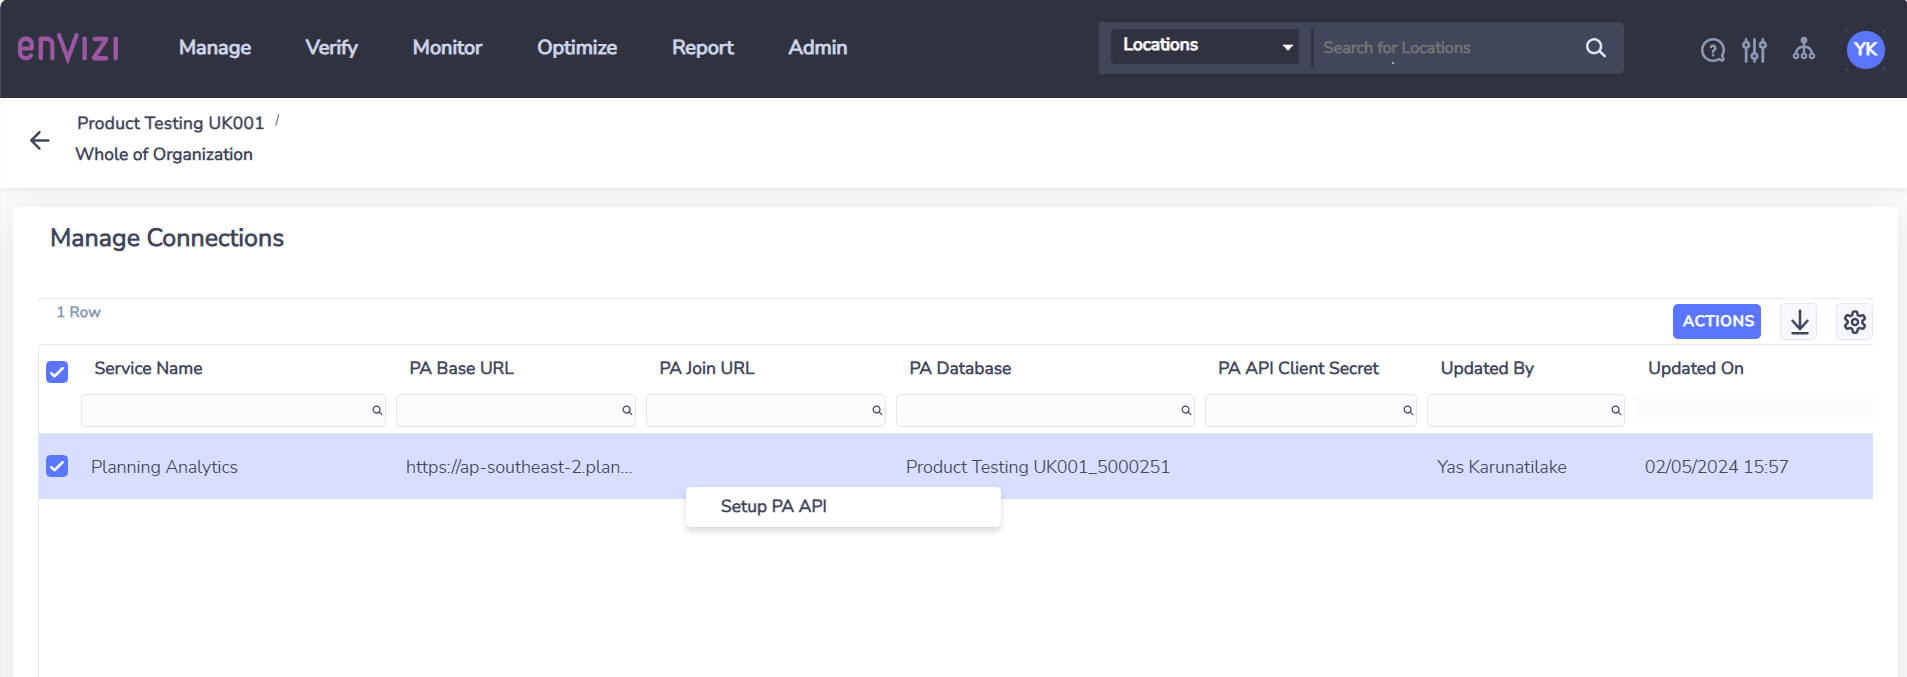
Service Name - the name of the data service
PA Base URL - the root URL for the Planning Analytics instance
PA Join URL - the URL suffix to access the API for your Planning Analytics instance
PA Database - the name of the database that must be configured in Planning Analytics
PA API Client Secret - the API key of a user with administrator rights to the Planning Analytics database
Updated By - name of the user that updated the connection details
Updated On - date and time when the connection details were last updated
Select the Setup PA API action which opens the form to update the connection details.

The PA Base URL will be prefilled depending on your region, and the PA Database name will be fixed for your Envizi instance. The other fields must be filled in as follows:
PA Join URL in the format api/<PA Tenant ID>/v0/tm1/. You can find the Tenant ID in the URL on the Planning Analytics homepage.
PA API Client Secret - the API key of a user with administrator rights to the Planning Analytics database
Select Save to save the credentials after which your integration will be active.