
Provisioning Amazon Transfer (SFTP)
Note that you must create a Data Pipeline to process files loaded via a Data Service.
Provision SFTP folder
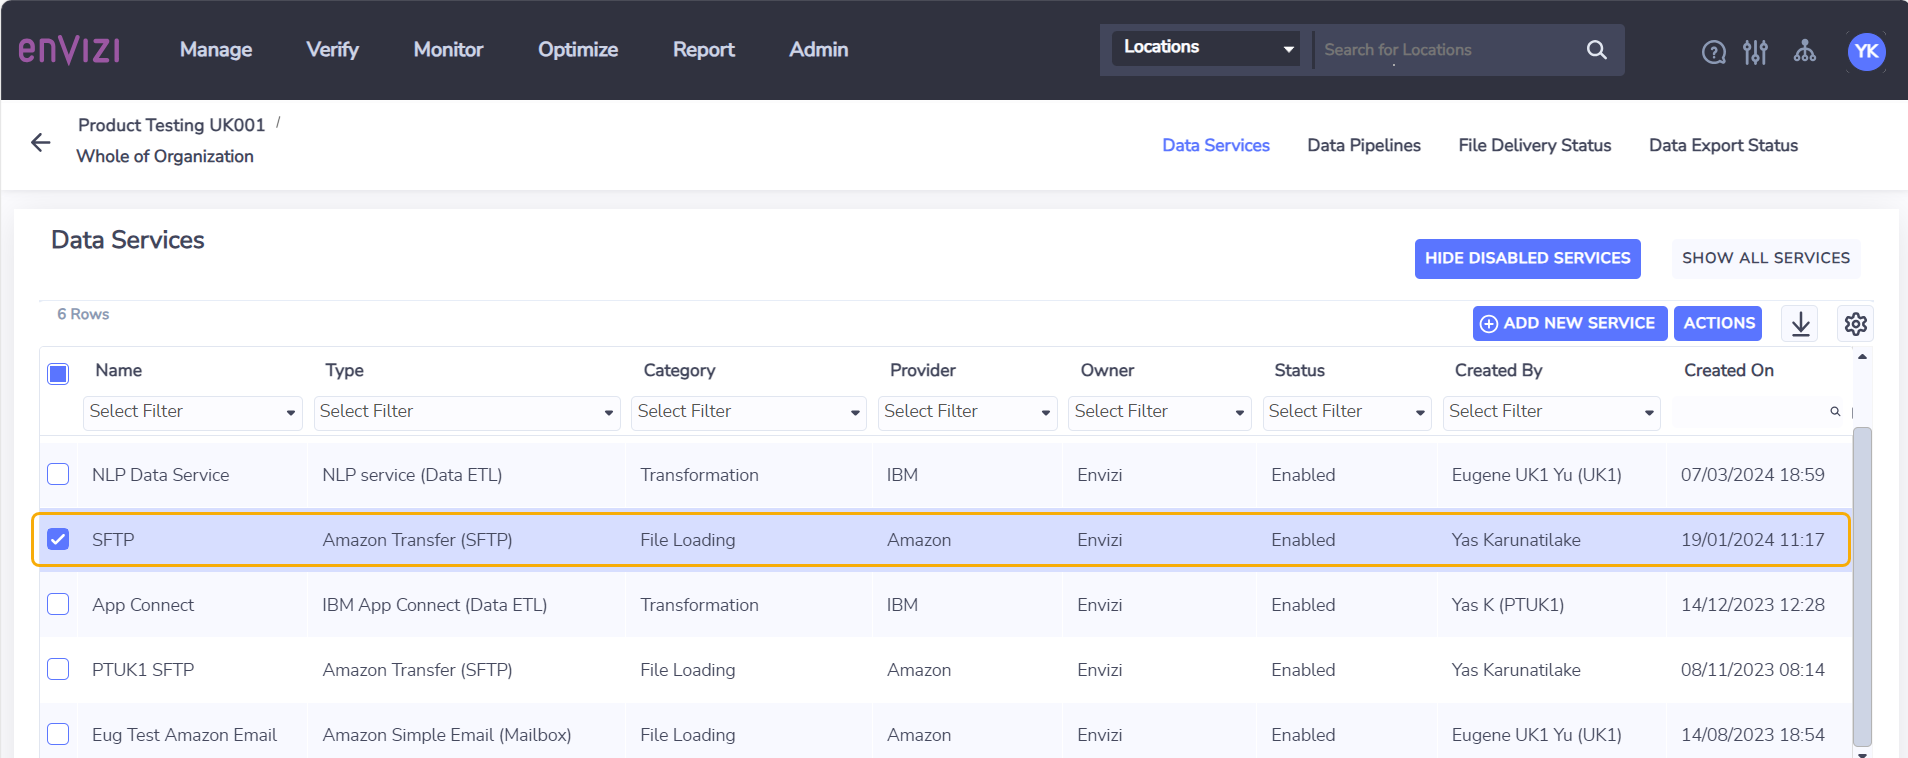
Go to Data Services page from the menu Admin → Data Flow Automation. This will display the Data Services grid on the page.

Select Add New Service to open the Add New Service screen.
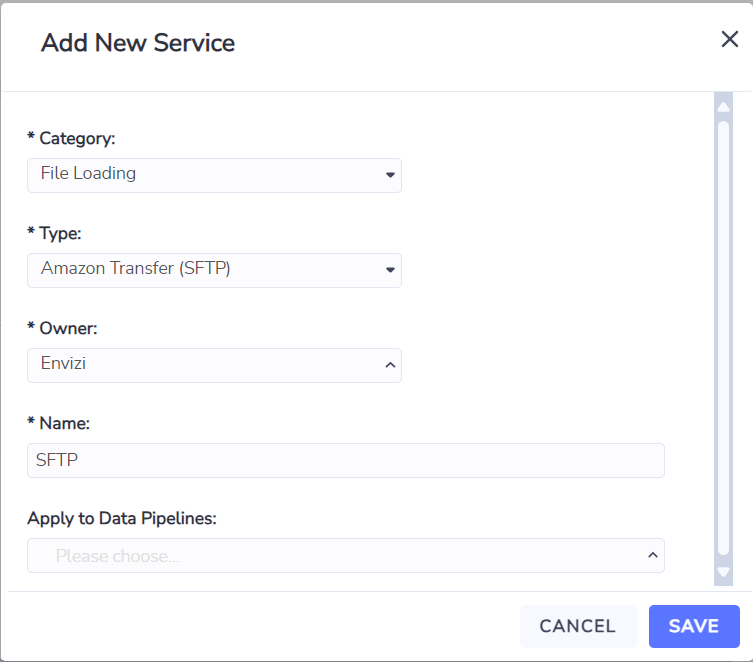
Select Category of either File Loading or Data Export (note: this cannot be changed once the service is created).
SFTP folders can be used for either File Loading or Data Export, but not both. This is specified by selecting the category on the Add New Service screen and cannot be changed after the service is created.
Select Amazon Transfer (SFTP) from the Type field
Select Envizi from Owner field
Enter name of the data service on Name field
Select any existing Data Pipelines to link the Data Service to.
Save the screen by choosing Save button
On the Data Services page, the new data service is listed.
Manage SFTP connection details
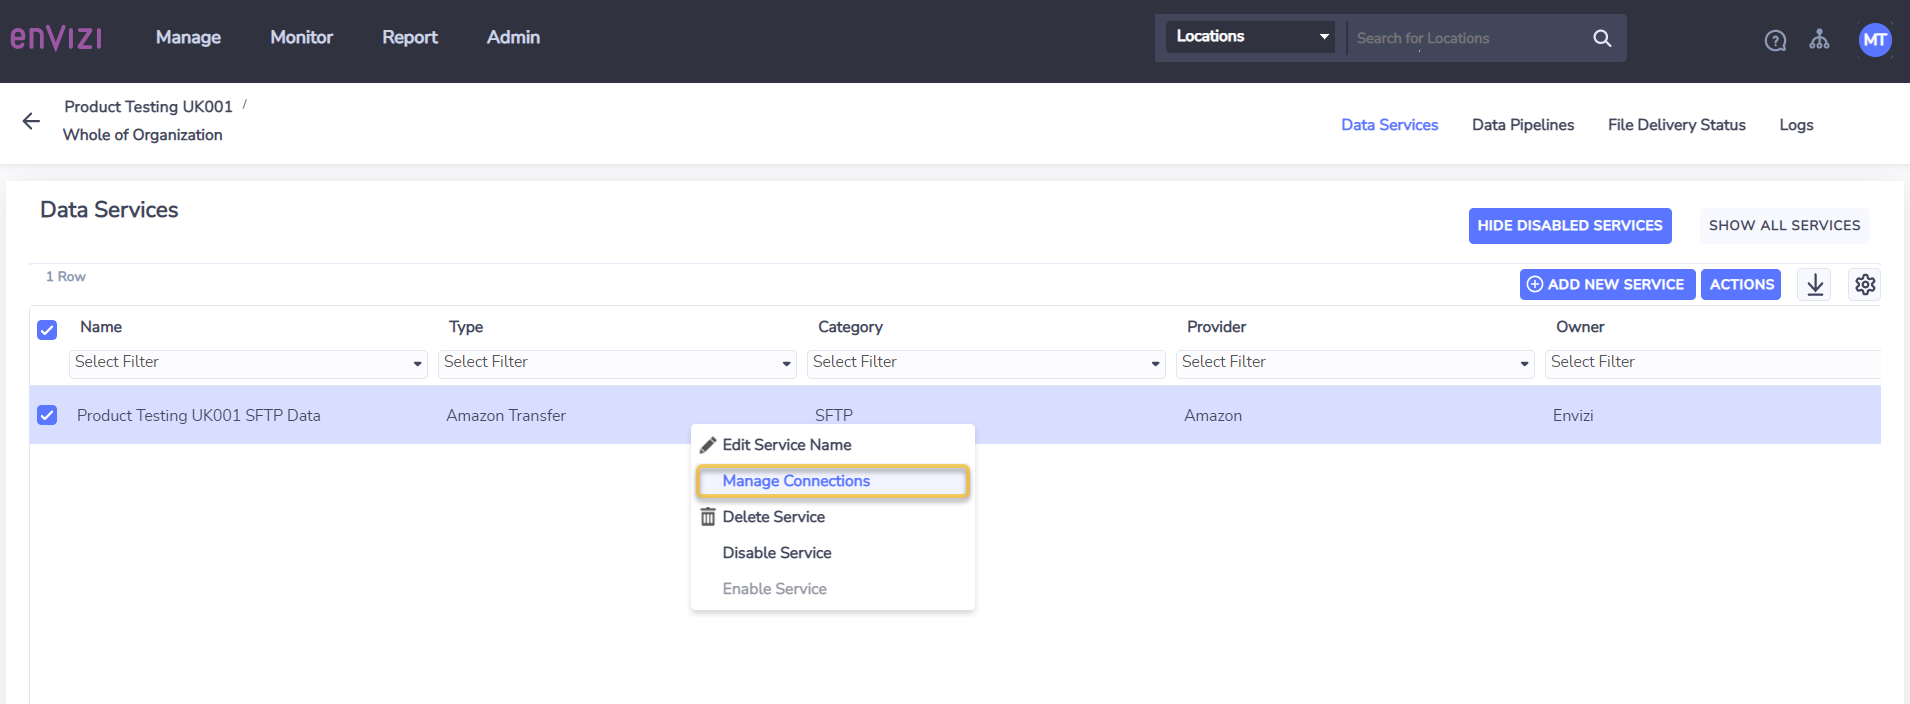
On the Data Services page, select an Amazon Transfer (SFTP) service
Right-click and choose Manage Connections from action menu. This will open Manage Connections screen.
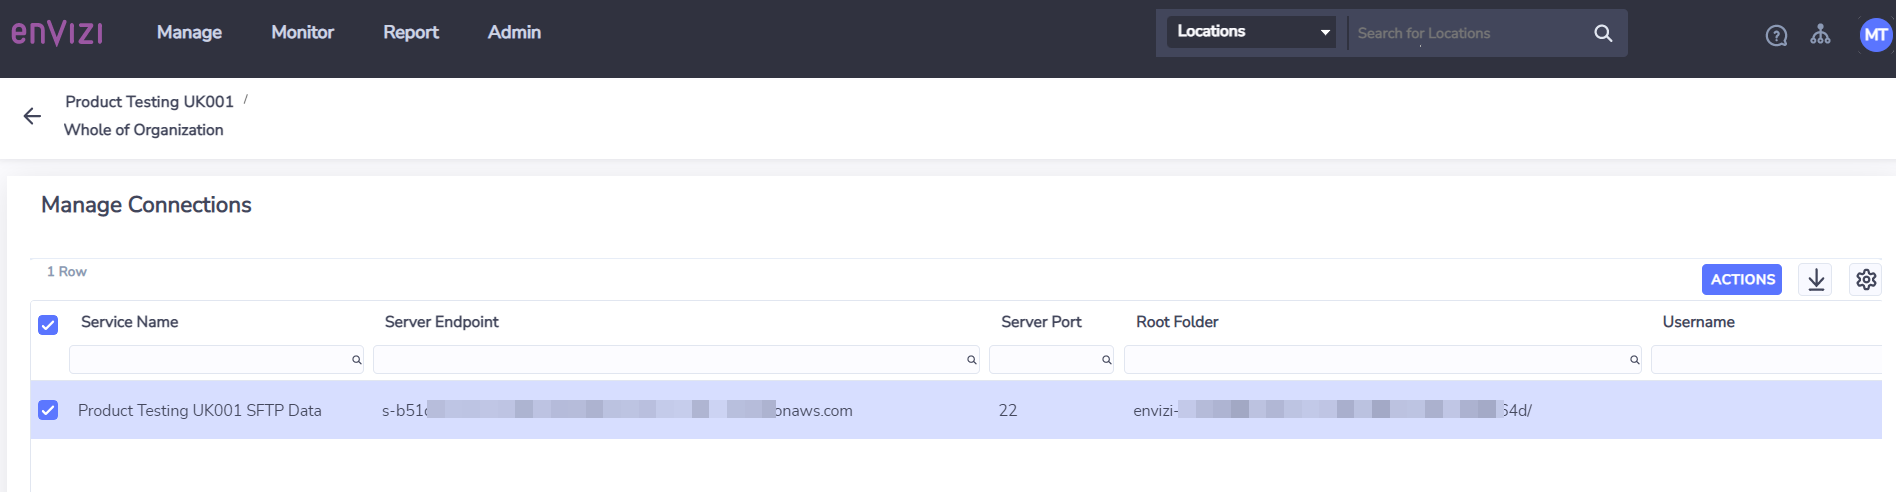
On the Manage Connections screen, the grid shows the following columns:
Service Name - the name of the data service
Server EndPoint - the SFTP host or server name
Server Port - default SFTP port
Root Folder - the SFTP directory
Username - the user that has exclusive access to the SFTP root folder or directory
SSH Public Key Id - Host reference id for the client’s public key. Note this is an Envizi reference Id to support troubleshooting SFTP issues. It is not the client’s SSH Public Key.
Updated By - name of the user that updated the connection details
Updated On - date and time when the connection details is last updated
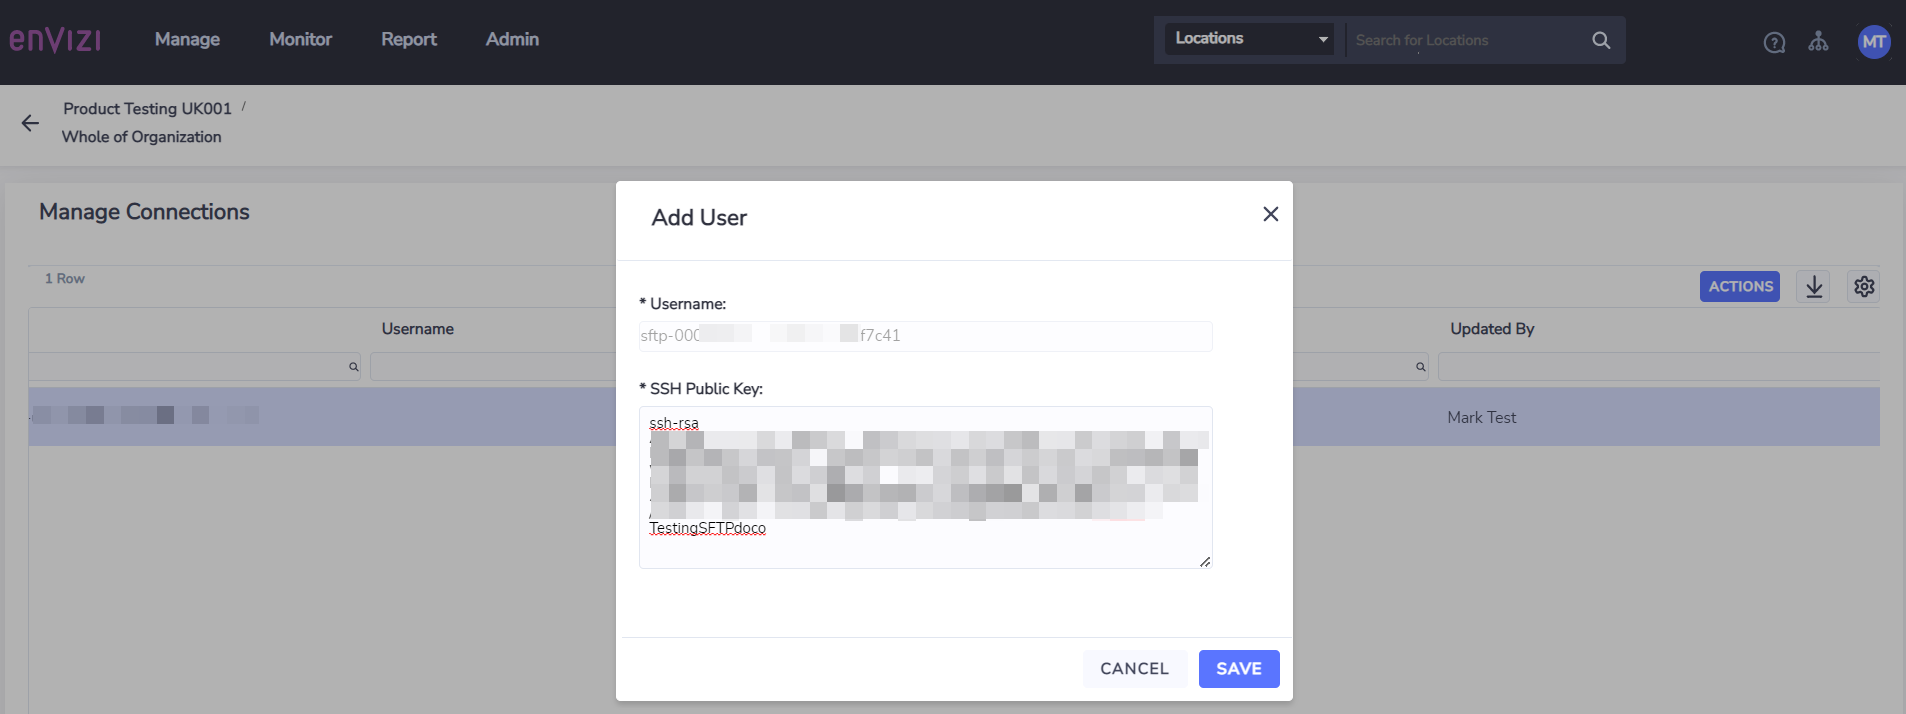
Adding a User
Envizi requires the SSH public key to be provided in OpenSSH format (i.e., starting with “ssh-rsa”). If your key is in the SSH2 format (i.e., starting with “---- BEGIN SSH2 PUBLIC KEY ----”) it will need to be converted to the OpenSSH format before entering the key below.
Use your preferred key generator to generate SSH public/private key pair of type ‘RSA’ and ‘2048’ bits. Save your Private Key file which you will use to authenticate connections to the SFTP server. You may optionally choose to add a key passphrase for extra security.
Copy your SSH Public Key from Step 1 above in the OpenSSH format. In Envizi, right-click on the connection and choose Add User from action menu which opens the Add User form with an autogenerated username. Paste in your SSH Public Key in the OpenSSH format and click Save.
You can now use your preferred file manager to connect to the SFTP directory for file transfer using
the connection details from Envizi
Server Endpoint (and Port)
Root Folder
Username
your private key file (and key passphrase if set).
Removing a user
On the Manage Connections page, select connection where the user will be removed.
Right-click and choose Delete User from the action menu.
A confirmation message will appear, confirming if the user wants to continue.
The user will be removed from the existing connection on the Manage Connections page.