
Provisioning Amazon S3 (Cloud Storage)
Note that you must create a Data Pipeline to process files loaded via a Data Service.
Provision S3 folder
Go to Data Services page from the menu Admin → Data Flow Automation. This will display the Data Services grid on the page.
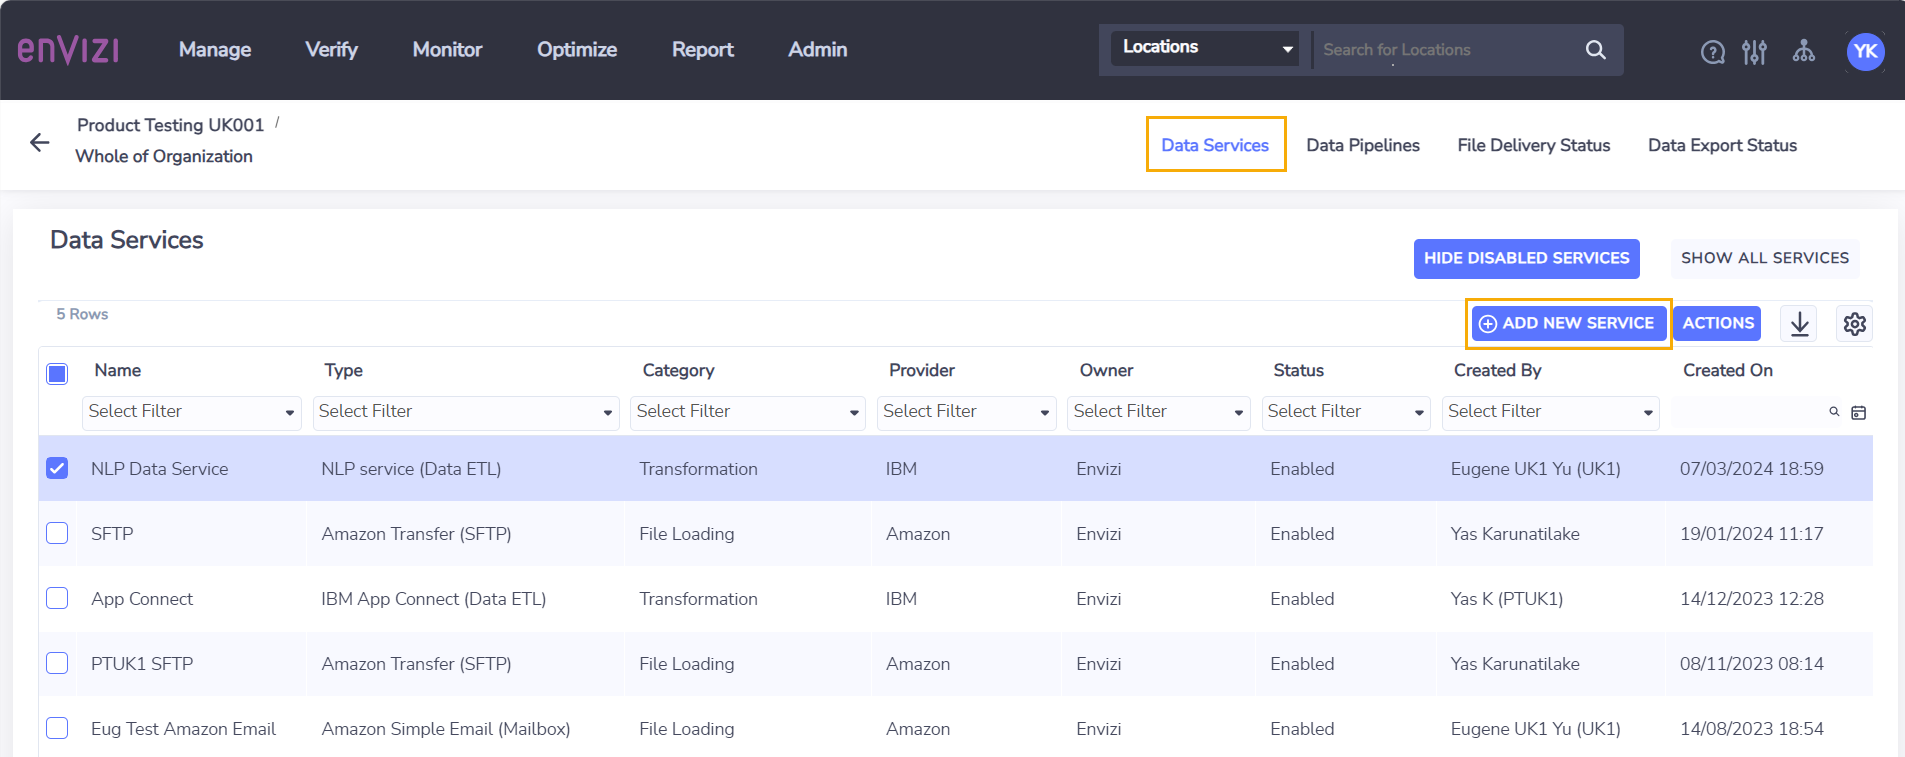
Select Add New Service to open the Add New Service screen.

Select Category of either File Loading or Data Export (note: this cannot be changed once the service is created).
S3 folders can be used for either File Loading or Data Export, but not both. This is specified by selecting the category on the Add New Service screen and cannot be changed after the service is created.
Select Amazon S3 (Cloud Storage) from the Type field
Select Envizi from Owner field
Enter name of the data service on Name field
Select any existing Data Pipelines to link the Data Service to.
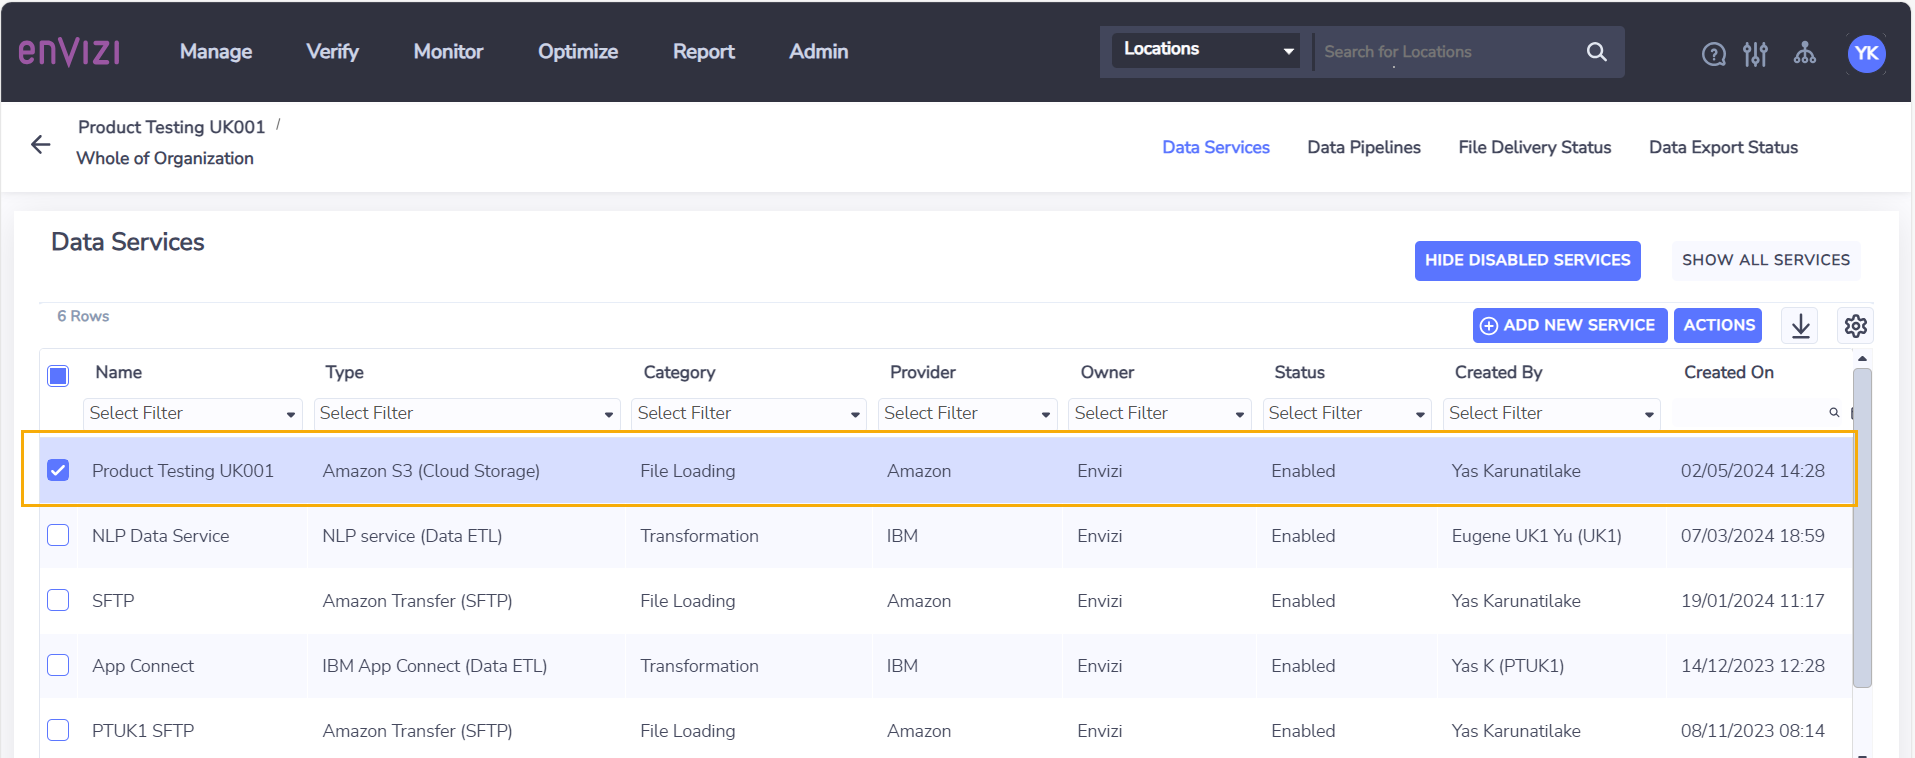
Save the screen by choosing Save button
On the Data Services page, the new data service is listed.
Manage S3 connection details
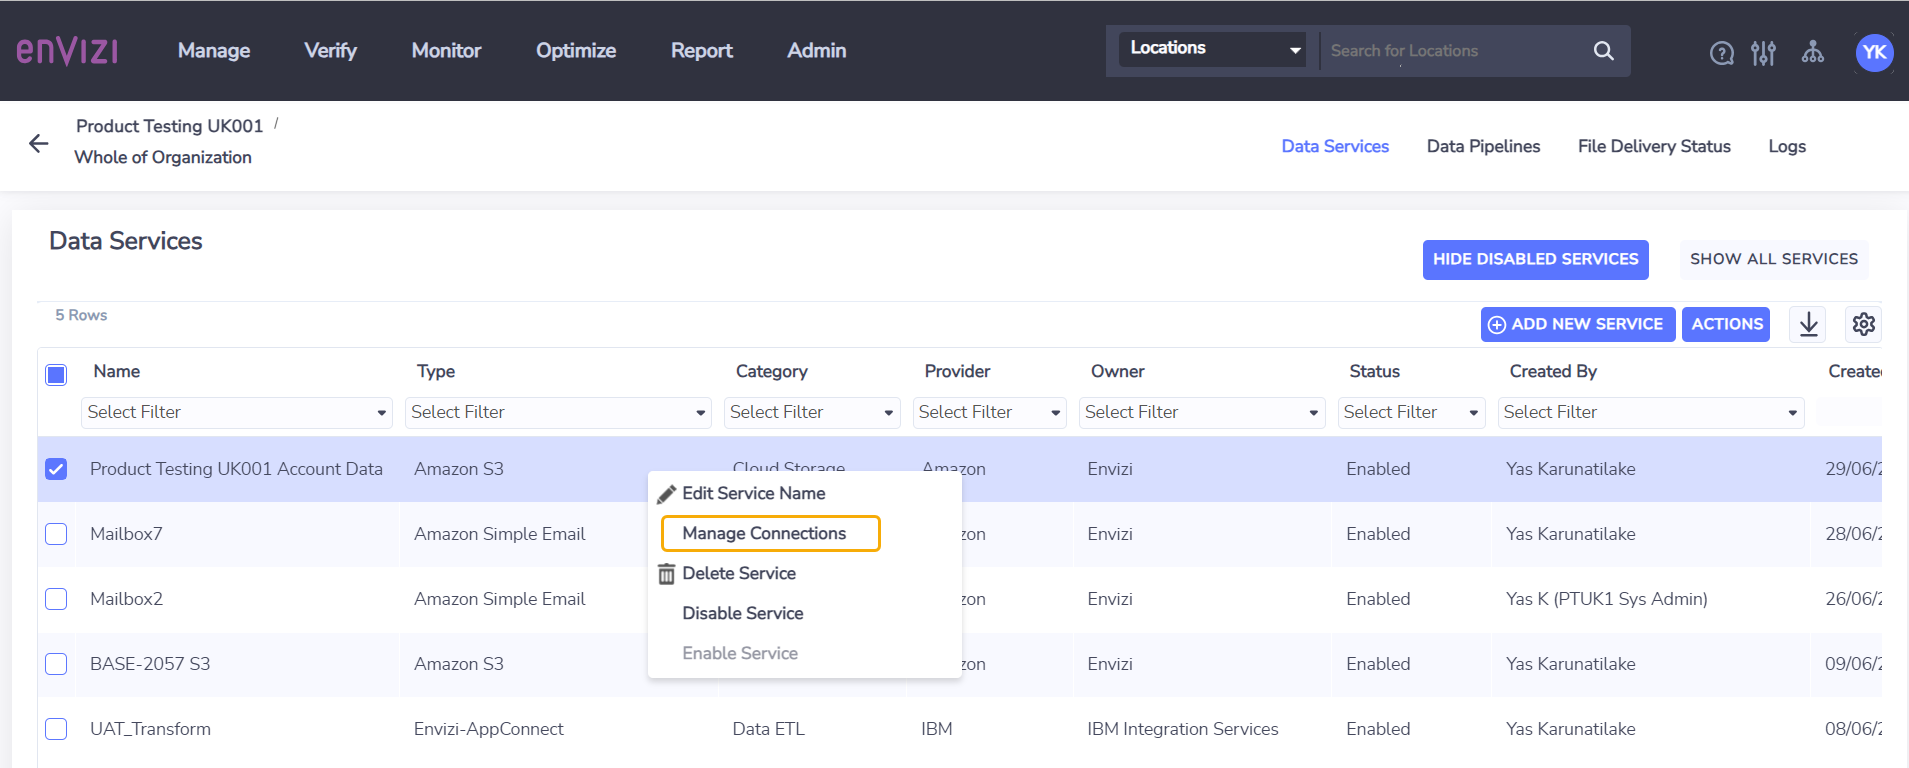
On the Data Services page, select an Amazon S3 Cloud Storage data service
Right-click and choose Manage Connections from action menu. This will open Manage Connections screen.
On the Manage Connections screen, the grid shows the following columns:
Service Name - the name of the data service
Bucket - the S3 bucket provisioned and managed by Envizi
Folder - the folder created under the S3 bucket
Username - the user that has exclusive access to the folder created under the S3 bucket
Access Key - access key for the user
Secret Access Key - secret for the access key
Updated By - name of the user that updated the connection details
Updated On - date and time when the connection details is last updated

Creating/resetting an access key
Be very careful when selecting this action as it will immediately reset an access key/secret access key pair meaning any persons or systems using the service will not be able to load data until they have updated their credentials.
A secret access key must be recorded when it is generated using the steps below. For security reasons, once the screen below is closed the secret access key cannot be retrieved again. If the secret access key is lost, the relevant access key cannot be used and a new key pair must be created.
On the Manage Connections page, select the connection where the access key will be created/reset
Right-click and choose Create/Reset Access Key from action menu. This will immediately reset the access key and secret access key and open the Create/Reset Access Key screen.
On the Create/Reset Access Key screen, a newly generated access key and secret access key will be visible
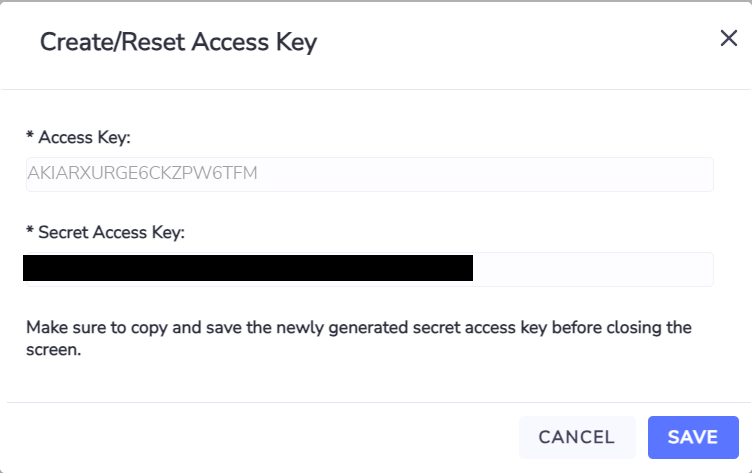
The secret access key must be recorded at this step. If you close the form without recording the secret access key you will not be able to retrieve it later and will need to start the process again to generate a new key pair.
Once the secret access key has been recorded, close the form.
The newly generated access key will be visible on the Manage Connections page
Removing an access key
On the Connection Details page, select a connection where access key will be removed
Right-click and choose Remove Access Key from the action menu.
A confirmation message will appear, confirming if the user wants to continue disabling the access key.
The access key and secret keys will be cleared on the Manage Connection page.