
Blank Target Data Template
The Blank Target Data Template is an Excel-based template and report that is intended to allow for bulk configuration of target data in a selected target. This template should be used any time you wish to create new target data for a Target container (to update existing target data use the Setup Target Data template/report).
Generating the Template
The Blank Target Data Template can be run directly from the Targets grids by right-clicking and choosing "Generate Blank Template".
This will bring up the selection criteria for the template.
Select Output Type – Default is to display on screen but the report can also be emailed.
Select Target – By default, the target that you had highlighted is the one selected.
For – This is a group filter that allows you to choose to generate blank values for a subset based on the group hierarchy.
Select – This is a location filter that allows you to choose to generate blank values for all locations or a single location.
Select Data Type(s) – This is a data type filter that allows you to choose only the relevant data types.
Filter by #1 – With this filter, it is important to choose the correct type of target data to generate blank values. For bottom-up targets, you should choose the same option as what was selected for the Lowest level of Targets for that target. For example, if the target was configured with the Lowest Level set to "Locations" then you should select "Locations" for this filter.
Filter by # 2 – This filter allows you to generate a blank template with rows for each month in the Target effective period range by choosing "Monthly" or to generate a single row for the full period of the target. If you choose "Full period", any target values will be apportioned monthly across the entire period.
Example of monthly output:
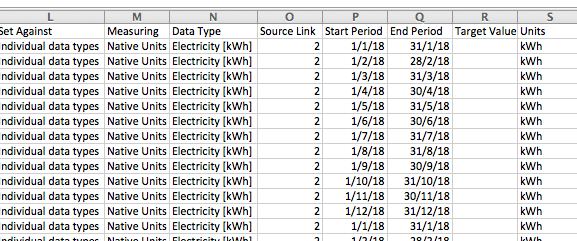
Example of full period output:

Populating the Template and Preparing it to be Processed
IMPORTANT – once the template has been generated you need to:
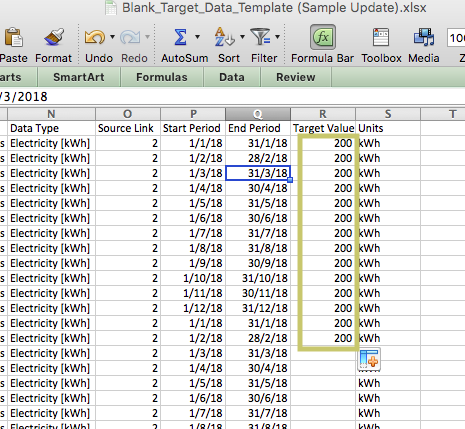
Enter the desired target values in column R (Target Value).
Delete any rows for which you do not wish to create target data.
Save the file as an xlsx document.
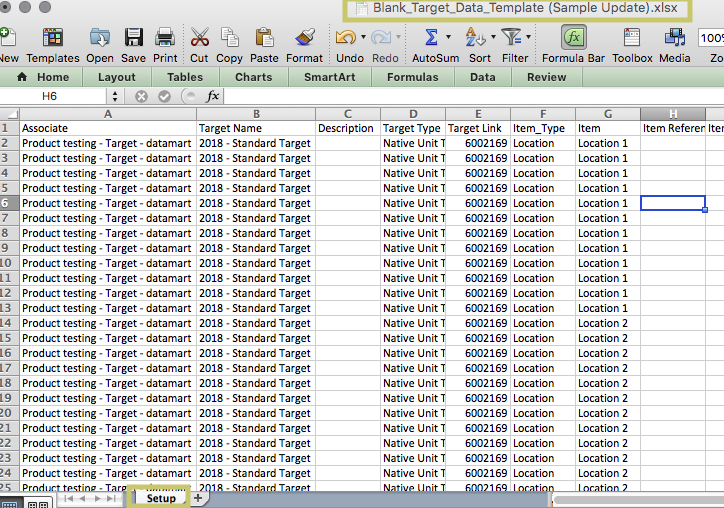
Ensure that the file name begins with (has the prefix) "Blank_Target_Data_Template". Eg. Blank_Target_Data_Template_2019 targets.xlsx
Ensure that the tab name is changed to "Setup"
Check the date format of columns P & Q (start and end period) to ensure that they are in a standard date format and not the raw excel number format (Eg. "01-Jan-18" not "43101").
Email the file to the standard Envizi address that you have been provided for loading files (eg. [email protected]).
Depending on the number of target values to be created and how busy the server is it may take anywhere from 5-30min to create the target data once it is sent to the system. To review the target data, you can either navigate to the Target Data in the platform (from the Targets grid) or run the "Setup Target Data" report.
Fields in the Template
Column | Column Heading | Description |
|---|---|---|
1-A | Associate | The name of the Organisation |
2-B | Target Name | The name of the selected Target |
3-C | Description | The description of the selected Target (if used) |
4-D | Target Type | The type of target being configured |
5-E | Target Link | An internal identifier used by the connector |
6-F | Item_Type | Indicates what kind of entity the target value is being set against (eg. Location, Account, Meter, etc.) |
7-G | Item | The specific name or number of the entity the target value is being set against |
8-H | Item Reference | For location this is the location reference, for accounts, it is the account reference |
9-I | Item Open Date | If the entity (eg. location, account) has an open date set it will appear here |
10-J | Item Close Date | If the entity (eg. location, account) has a close date set it will appear here. If set you should not configure target data past the close date. |
11-K | Item Link | An internal identifier used by the connector |
12-L | Set Against | For most targets this is will indicate that the values are set against individual data types (other options will be discussed in those specific use cases) |
13-M | Measuring | Will indicate if target values are to be set in native units or alternatively in a specific normalised value (eg. Energy, Emissions, etc) |
14-N | Data Type | The data type the target value is being set against |
15-O | Source Link | An internal identifier used by the connector |
16-P | Start Period | The start period (beginning of the month) for the target value being set |
17-Q | End Period | The end period (end of the month) for the target value being set |
18-R | Target Value | Where you should enter the desired target value for the period indicated in the row. This is the only column that you should need to edit. |
19-S | Units | If available this indicates the units in which the target value is being captured |