
Scheduling Reports
Configure and set up Scheduled Reports
Most reports in Envizi can be scheduled to run daily, weekly or monthly into the future. To schedule a report, choose the ‘Schedule Report and E-Mail it later’ option in the ‘Select Output Type’ option on the reporting criteria selection page.

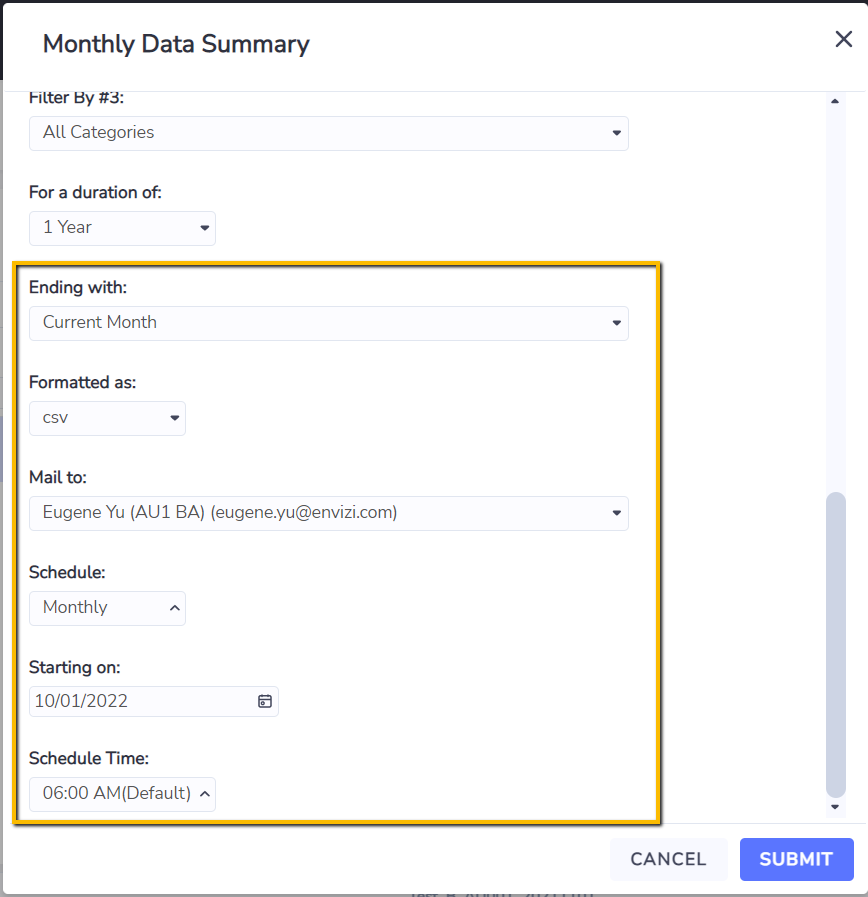
Once selected, the form will be refreshed to bring you additional fields to complete the reporting scheduling set up. These additional fields include:
Ending with - Current Month/Previous Month/Previous Quarter/Previous Year
Formatted as - mostly ‘csv’ only
Mail to - the email address the report will be sent to, defaults to the current user
Schedule - choose from the following options:
Daily
Weekly
Every 2 weeks
Monthly
Every 2 Months
Quarterly
Half Yearly
Yearly
Starting on - the date the schedule will start to take effect
Schedule Time - choose a time in the day (up to half an hour resolution, e.g., 06:30 AM, in your local time) that the report will be picked up to join the processing queue, and subsequently to be generated and sent out. If untouched, it will default to a time predefined in the platform (typically early in the morning in server’s local time).
View and Manage Scheduled Reports
Once a report schedule has been established, you will be expecting to receive reports via email from time to time based on the schedule that has been set up. However if you want to make changes to existing report schedules, make amendments, or to remove any of the schedules, you can do so by visiting the ‘Scheduled Reports and Dashboards’ page.
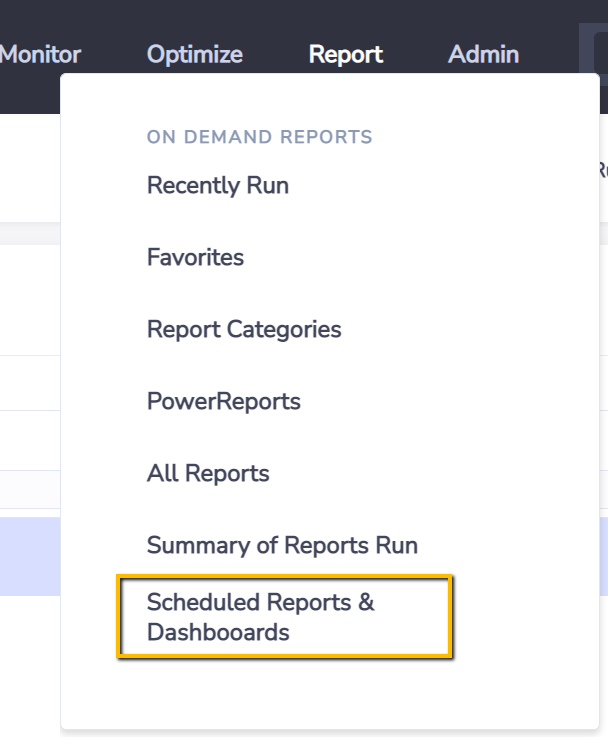
It is accessible via Report → Scheduled Reports & Dashboards
The page lists all details about the scheduled reports, such as its frequency (daily, monthly etc.), when it will be run next, when the schedule was first established, and so on.

You can right click a schedule and perform the following actions:
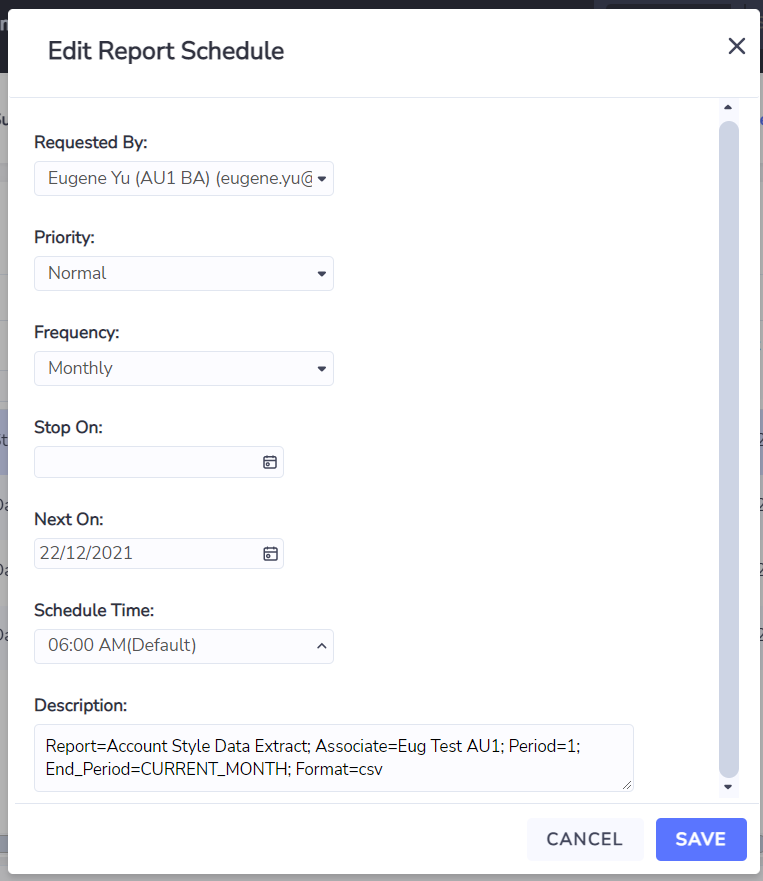
Edit Report Schedule - you can make changes to the report schedule such as its frequency, its next run time, and the time of the day the report will be generated and sent out.
Delete Report Schedule - remove the report schedule completely. Note you may still receive one or two last emails with the report after the deletion here, since these scheduling jobs may have already been registered to the platform before your deletion.
Create a copy of this schedule - a new copy of the report schedule will be created. It is also expected that the new schedule should be amended shortly after, to avoid the system sending out duplicated reports to the same user.
Email Report/Dashboard Now - no need to wait for the schedule run to happen, a request will be registered immediately to the platform to send out the report to the corresponding recipients that have been set up in the report schedule. This option is handy especially when you want to perform a test run of the report before the actual scheduled run happens.