
Data Inactivity Rules Uses and Best Practices
How data inactivity rules work
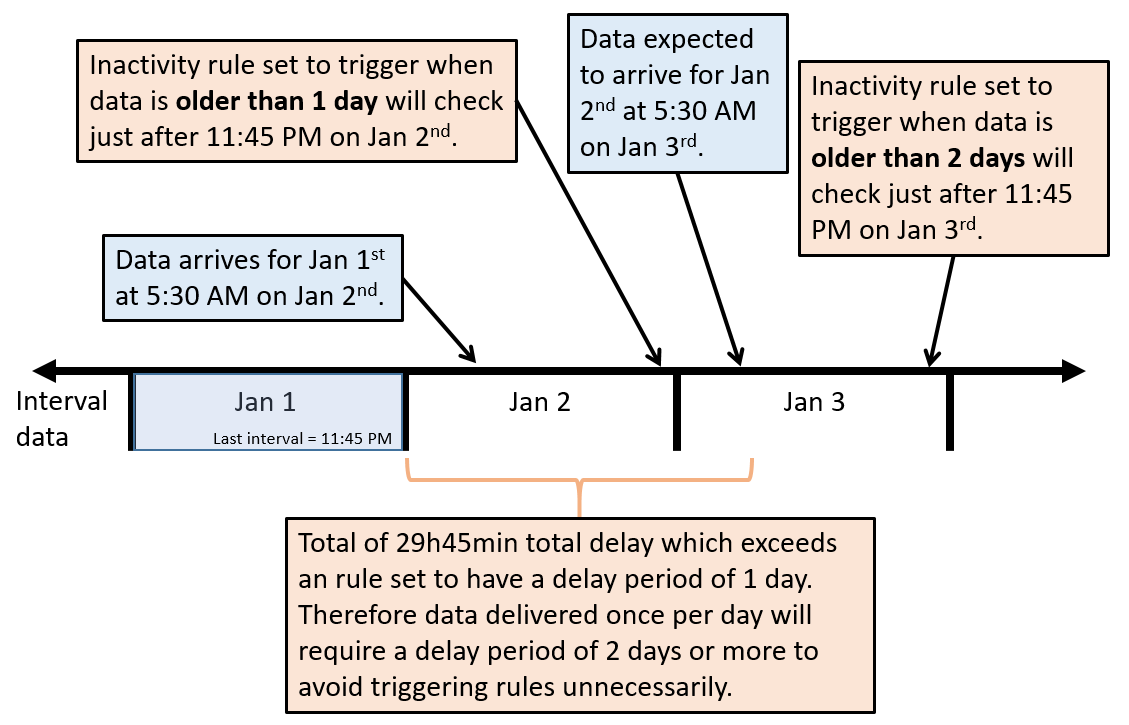
A data inactivity rule will alert you to situations where interval data has not arrived for a meter after a defined period of time. For example if you have an electricity meter that is expected to have data arrive daily, you can set an inactivity rule to let you know if data is ever older than 2 days.
The diagram below describes how inactivity rules work. The important point to note is that the delay period of an alert compares the current time against the last interval. Therefore if you are expecting your meter to receive data daily, you should set your inactivity period to 2 days to account for any processing time required from your last recorded interval to when the data is delivered.
Notification contacts
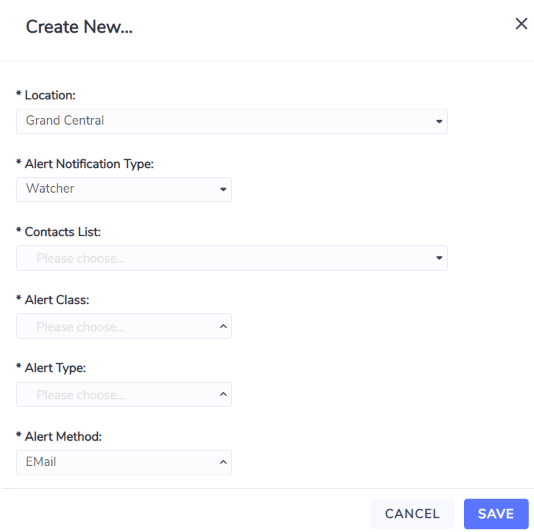
First you should create a notification contact at the location for which your rule will be set. To do this you can right-click on a location in the Locations grid or when on a location dashboard go to the "More" menu and select "Notification Contacts".
This ensures that whenever a rule is triggered, the contact will receive alerts based on the alert class and alert type.
Alert class contains 4 possible selections, depending on the modules your organisation and user has access to. These include BEPA Alerts, EFD Rule, Inactivity Alerts and Normal Alerts.
Alert type allows you to define which contacts are notified based on the severity of alerts. Alert types include: Low, Standard, High and Critical.
Alert method: currently only e-mail is available as an option.
Note
If you would like to stop receiving alerts, you can either switch the Alert Type to "Disabled" or you can delete the contact from this list.
Inactivity rules
A data inactivity rule will alert you to situations where interval data has not arrived for a meter after a defined period of time. For example if you have an electricity meter that is expected to have data arrive daily, you can set an inactivity rule to let you know if data is ever older than 2 days.
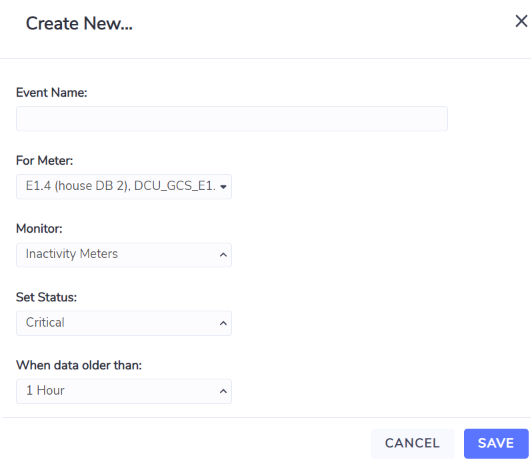
To create a new inactivity rule, right click on a meter in the Meters grid, or on any meters dashboard select the "More" menu and choose "Inactivity rule".
Event name - this field can be named something meaningful. This will provide a reference for you if this alert is ever triggered. Best practice is to include the name of your location and meter as this will be referenced in the email you receive if ever the alert is triggered.
For Meter - this field is not editable and refers to the meter that you are creating the rule for.
Monitor - this field is not editable and refers to the type of meter you are creating.
Set Status - this field determines the severity of the rule and also determines who will be notified of the rule if it is triggered. For example, a rule set to "Critical" will only be sent to notification contacts that are set to receive "critical" alerts.
When data is older than - this field records the amount of time that is allowed to pass from last interval timestamp and the delivery of the next set of interval data. For example, if you are expecting data to arrive every hour, then setting this field to 2 hours will alert you when data is older than 2 hours.
Note
Currently daylight savings time is not considered when determining when an alert should trigger. This means when regions are in daylight savings time an alert with a value of 12 hours set for "when data is older than" will only trigger when data is older than 13 hours.
"When data is older than" options in UI:
1 - 48 hrs
3 - 6 days
1 week
2 weeks
1 - 6 month